Back from Steel Lard sufficiently late and tired having got up at 6am to be on the road for 7 that you weren't getting an update then!
AndyM picked me and a lot of terrain boards up at 7am, in his nice spacious Audi, and we caned it up the A1 and across to Sheffield in plenty of time to set up for Game 1.
First raid scenario - Coastal Raid. This is the third time I've play tested it, and like the other one I ran, I decided not to do random terrain placement so I could get a feel for how a roughly balanced setup plays. I'll probably run it a couple more times with settings at the more extreme end of random to se if they need tweaking.
 |
| The table. Longboats are Revell (cut down to a waterline model by Andy, who'll be along later to explain how tricky this is!) and Adrians Walls resin (on loan from Carl at our club) |
 |
| The British levy, having raised the alarm, do what any sensible shield wall would do, and wait upslope for the Saxon elites. |
 |
| ...who do a lot of screaming, yelling and banging spears on shields before charging up at them. The levy actually survived two rounds without losing their amphora, took out the Saxon champion but did lose their leader and just barely suffered excess shock. |
 |
| So the Saxons decided they could safely ignore the levy and headed for the village, where their warriors were already advancing. |
 |
| The British levy, by dint of a Rally card and some support from their own slingers manage to survive the very annoying Saxon archers without going into excess shock again... |
 |
| Meanwhile, the Saxon levy decide they're not going to face the British warriors on the upslope, but instead skirt up and round the hill... |
 |
| Here come the British heartguard, while one of the Saxon leaders decides to do some quick looting.... |
 |
| Saxon archers driven off, the British slingers head inland while the levy hang around by the Saxon longships to provide a roadblock... (still on lots of shock with no leader around...) |
 |
| The Saxons fall just short in their attach, so the British counter-charge... |
 |
| ...and drive them back.. |
 |
| The British turn to fall just short, before the Saxons (having rallied off a fair chunk of Shock) manage to use a rather nice hand of cards to make a fair mess... |
 |
| ...while their hearhguard are now upslope of the British warriors. You will note fleeing British hearthguard in the background! |
 |
British warriors driven back, half the force defending the village itself driven off.
Saxon victory. |
For game two, I decided to test out the Treasure Hunt raid scenario again. Again I set the table, rather than allowing a random scenery layout, partly for testing balance and partly because it made for a prettier table.
 |
| Six 'random' treasure locations: the willow island in the marsh, the rocky outcrop, the ruined Roman temple, the fallen Roman column in the wood, the barrow and the stone in the woods (that did have a sword stuck in it till it broke off!). |
 |
| Early scrap right in front of the barrow (really glad I took the time to finish that on Friday!) |
 |
| Battle lines are drawn. The British are consolidating on and around the barrow,. the Saxons have just about fallen over a ruined Roman column in the woods.... |
 |
| The two hearthguard units face off. Meanwhile the British slingers find a nice vantage point atop the barrow to shoot over people's heads. |
 |
"Olaf? What's that you've found?"
"I... uh. Don't know. Some kind of round thing with ends that unscrew. Has Roman runes on it. Probably not important."
Britons; "It's a SCROLL, YOU IDIOT, Don't trash it!" |
 |
| There's a bit of a scrap going on beyond the woods that drives away some British levy. Which is just fine by them as they'll go looking for treasure... |
 |
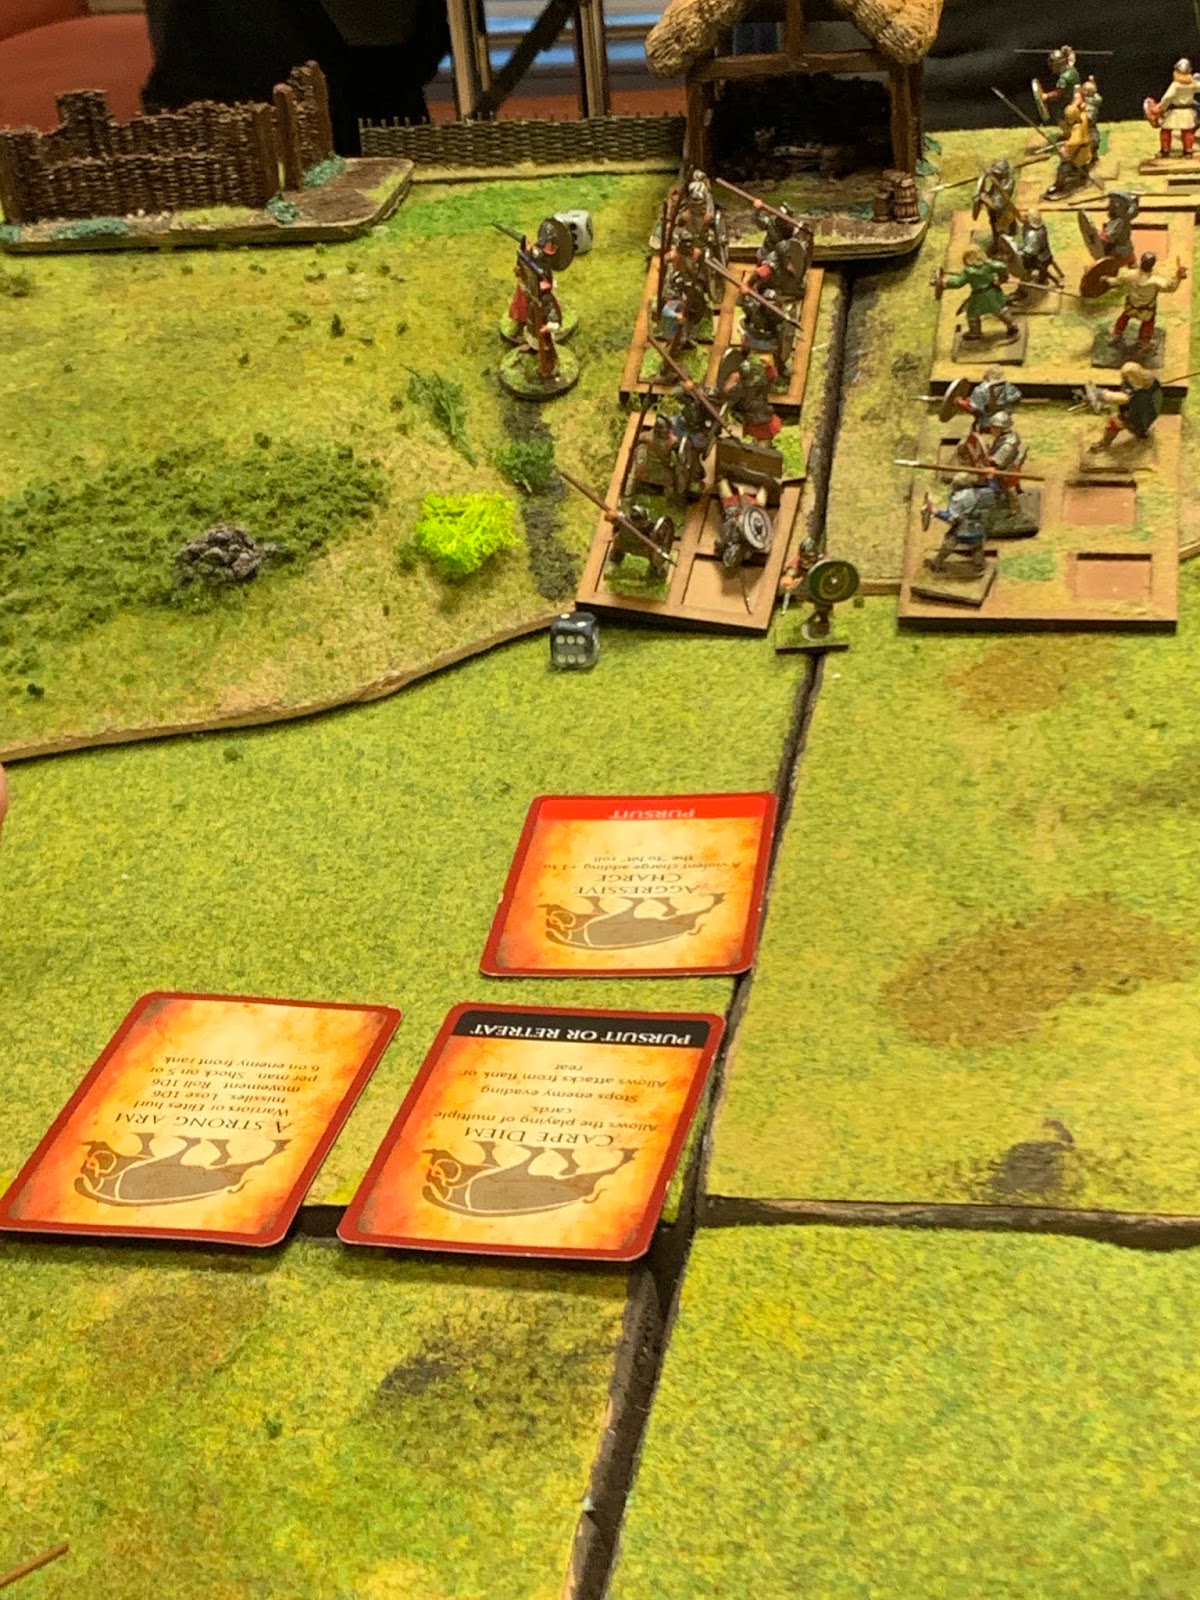
The prelude to a perfect piece of card play (and the middle of a rather complex piece of 'ok, just how do we resolve this according to the rules?'). The British hearthguard, which were forming the front rank of the unit in the centre, have been shocked enough to fall back a couple of inches. Not enough to break the formation, but they are pretty much in contact with the small group of Saxons behind them, which kind of a) makes this a rather confused ongoing combat and b) means that this is, as the saying goes, Going To Hurt. A Lot, as, with a Carpe Diem, if the Saxons warriors activate they get to do the British a lot of damage with a rear attack.
Except that the British Lord activates first, and lo and behold, he has a Disengage, which gets him very very nicely out of what was a pretty sticky predicament.
My memory is sketchy as to what happened next, except that the Saxons took a fair force morale hit somewhere, and we wrapped it up as a British win. |
Note to self: need to think about exactly how the whole business of shieldwalls where the front rank is elites and the rear warriors behaves when the front rank's morale starts breaking. because it can get a bit complex.
So, that was my bit of Steel Lard. Some very pretty tables around,. which I didn't have time to take pictures of - check the hashtag
#SteelLard on Twitter for pictures of the games, as well as the alcohol-hazed proceedings both before and after. Thanks to all my players, to Andy for the lift and company, and Tom for organising a fabulous day. We must do it again.


Looks great. Your white horse looks aces on table!
ReplyDeleteNice terrain!
ReplyDeleteRe the Revell long boat - Made up with all the structural parts then "very carefully" used an electric plane to shave off the required amount of keel. Once down to the correct level used plasticard as a base to stabilise it. Rolled sail made with milliput.
ReplyDelete