Tuesday 30 April 2019

One of THOSE days...

Got out to Trains4U to pick up a bag or two of Javis Summer grass - while I'm moving over to the WarWorld stuff, I need some so I can actually match up the colours, and I'm not sure the WWS delivery will arrive before Andy's next here! :D

Also picked up a 5 x12L Really Useful drawer unit for more storage, and moved the big 3-wide 4L and 9L unit to the studio. I am *determined* to have more storage space than stuff to store before the simmer is through.

Started on my action list for the last show meeting.

And that's about it for hobby today :D  Unless you count booking flights to the US, which will include at least two hobby-related meetups.

Monday 29 April 2019

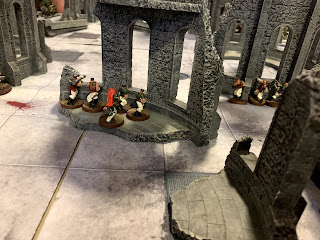
Battle Report - 29-Apr-2019 - Free Fire

Playtesting Rob from the club's new set of generic rules, "Free Fire", about which more in detail later, I suspect.

Union Marines deployed
We were using the SciFi bolt-ons, in a scenario which involved a three cornered fight between some Union Marines trying to get the local ambassador to a dropship pickup and off planet, some locals who wanted to capture him to get the Union's attention and some goblinoids who (like their kind in every setting) didn't care who they killed.

Figures by Scotia Grendel - who will be at this year's
Hereward show.

We only got two turns in, in which it was kind of interesting to see how the differently statted and led forces handled completely differently (by design). Also, how rubbish my dice rolling was. It's a d8 based system, and I suspect d8s don't like me one bit :D

More, doubtless, when we get to playtest some more. It has a very interesting skill/combat system based on, essentially, one well designed core mechanic (yes, this is a well-known way to impress me), and so far it seems to work.

Other club members have already had a go at it in a fantasy setting, and we\re considering it for a WW2 setting for a show game at some point.  

Sunday 28 April 2019

Beach boards part 10 - time for grass

Back from Captain Marvel - heh. Fun movie.

Furballs! :D

Today I broke out the heavy duty grassing tools.... (and also found my original post on the beach boards)
WarWorld Scenics static applicator, some of their Autumn and Wild Meadow grass, their layering spray, and (out of shot) some diluted PVA and the last of my Javis summer grass. Which latter, annoyingly, wasn't enough to do the base layer on everything...
But I did get this done. Now to clean up the loose grass, touch up the water, add waves, fix the shingle and sand.... oh, and buy some more bulk 2mm grass that's a decent match for Javis Summer. And dump the shirt that has static grass clinging to it in the laundry :D

Saturday 27 April 2019

Beach boards part 9 - ink wash

Plans changed - today was to be the trip to the cinema to see Captain Marvel so we're caught up, and can go see Avengers: Endgame, but Anne's feeling a bit iffy and James has a scheduled gaming session for 7, so that's been deferred till tomorrow.

Instead, I got stuck in on the beach boards. (In case you're wondering about the little board for the watchtower, it's sitting upside down having had its underside painted to try and remove the slight warp!)
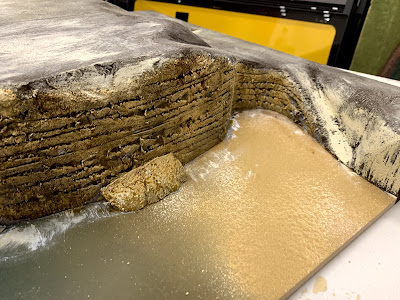
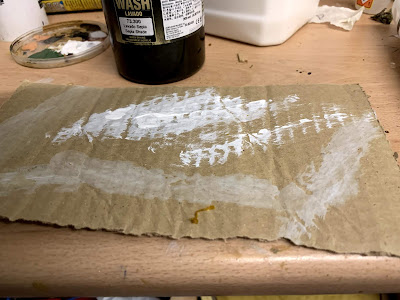
Drybrushed the grey rocks with white. The idea behind this is mostly to give a pattern of light and dark - almost a contrast map - that the semi-transparent Vallejo ink wash can pick up. This was allowed to dry and then I started on the wash.
Also dry-brushed the Bitter Chocolate on the flat areas with a pale sand colour. Will probably redo all the sand on the beach as well before I'm done, to a mix of that pale sand and a yellow ochre.
The stack is my little tester piece, as I inked it first and it's pretty much dry. Hence, I can use it to demonstrate what's in store for the big cliff.

Dry/over-brushed the ink-washed areas with pale cream acrylic, and then added some Javis static grass. Rather pleased with that, I am :D Mayadd a couple of small grass and flower tufts.

Friday 26 April 2019

Beach boards part 8 - and a little extra

AndyM dropped round late this afternoon, so we spent a couple of hours working on the next stage of the beach boards and adding to what I'd done over lunch.
An extra piece as a base for the Warbases watchtower.
...carefully sized to fit on top.
Starting texturing... My hands hurt by the time I'd done the whole promontory. 
And then out with various saw blades to cut in the limestone layers.
...while Andy shapes the stack.
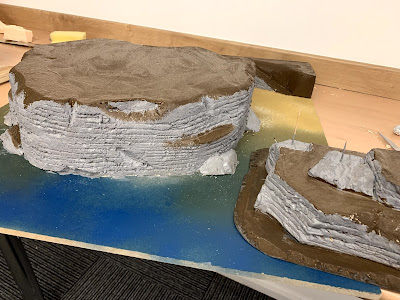
Promontory and stack ready for undercoat.
Grey emulsion about 4:1:2 with PVA and water for the rocks...
 ....and Sandtex textured Bitter Chocolate for the areas that will be grassed eventually.
And the bay board as well.
Some spare 25mm blue foam and a foam board offcut, for a future project...
...for a diorama base for some of these....

Thursday 25 April 2019

Moving boxes, and a shelfie...

Since I now have a large studio space that isn't being used by PE2Collectables, and Reuben left me four bookcases, I've done a bit of moving:
  • Because I'm running out of shelf space in the music room (and anyway, I'd rather that shelf space had musical and 3D printer kit on it);
  • Because I need shelf space for some scenery bits;
  • Because I'm fed up of clearing the kitchen table or half the dining room to play board games;
  • Because my military history books are currently upstairs (about 3 shelves worth still to move), and
  • I've committed to doing some IABSM and Dux videos (if TFL don't beat me to it), for which a decent uncluttered table area with space around it for camera tripods, with a suitably nice backdrop, wouldn't hurt.
Like... this...


Wednesday 24 April 2019

Beach boards part 7 - some additions

Not much to account for - most of today's hobby activity was tidying and moving shelves in the studio, and gluing the railings to the watchtower.

But I did pop out into what I think is going to be called the workshop, where the beach boards are, and do a little carving and gluing, just to add a few different bits of rock around the base of the promontory. Also managed to snap the long blade I was using in the craft knife, so I'll need to pick up some spare blades or (given they're cheap) a new pack of knives. I'll probably do some more surface work when Andy's next here, and then possibly some careful application of a heat gun to smooth off some of the edges (this is a trick I picked up from Luke APS on YouTube).

The aim is to have the top flat, grassed but largely untextured in case I don't want to put anything on it, such that any building with a roughly 8' square or maybe 10" near-circular terrain base will sit flat on it. This allows me to (for example) base the watchtower on a terrain cameo that lifts it another 2" up, or create a base for part of the club's Warlord Atlantik Wall set.
Obviously not the final base, but you get the idea.
The little stack isn't glued down (or shaped yet), as it'll get in the way of texturing the inside face.  
This face still to be hacked about.
Some exploratory carving done here.

Tuesday 23 April 2019

More on the Warbases watchtower

Just a quick round of what's pretty much the usual for Dark Ages buildings. Artists filler on the walls, white undercoat, light wash with dilute off-white, paint the wood using Vallejo concrete as a first step.

Roof is also done barring teddy bear fur thatch, but I forget to put it on before I took the photo.

More layers on the wood to do, and the thatch, then it's basing and we're done. Basing may be a little interesting, and I may wait till I've done the promontory it's going to be standing on.

Quietly chuffed that the Omaha Beach boards are in the Terrain Tutor's top 6 from Salute.

Monday 22 April 2019

The Miller's Tale - Episode 6

Episode 6: In which Mike talks about responsibility.... (ooo! scary!)
Links to things mentioned in the podcast
If there's anything I missed, please let me know. I'm keen for any feedback, obviously enough - you can comment here, or if you'd rather it wasn't public, by email to podcast@the-mill-house.org.uk

[Apologies - I do appear, on editing this episode, to have had more of the tail end of a cold than I remember - I've done my best to edit out the heavy breathing where I can :D]

Sunday 21 April 2019

Beach boards 6 - more rock experiments

A happy Easter those of my friends who celebrate. Been a bit of a fragmented day today, largely due to two visits to church and sorting out a parental crisis (Mum's Kindle - 7 years old - died, and she's pretty lost without stuff to read (has eyesight worse than mine, so the ability to essentially make any book large print is a huge win for her, and Amazon in their wisdom only have one Kindle with page turn buttons any more), so there was much sorting out of how to get her a new Kindle Oasis ASAP)...

I managed to pop in and out and do some more rock tests, and negotiate a free morning with the Domestic Goddess tomorrow to edit and post the podcast. Re the former...

Another spare bit of pink foam. This time I hacked it about a bit with a long-bladed craft knife.
Note: for this you really need XPS foam (extruded, not expanded) variously available in grey, pink and blue these days. The white expanded stuff used for packing won't take the detail. 
Texture applied with foil rollers as before.
And then hacked about a bit with the blunt serrated knife, then undercoated with an equal parts mix of mid grey emulsion, white acrylic, PVA and water. Slightly runnier, so it got into the cracks a bit better.
I can't remember *exaclty* what we have here, but I think it's (L-R in the seven bands):
- Dilute yellow ochre
- not sure
- Vallejo wash over dilute yellow ochre
- not sure
- rather lightly applied Vallejo wash
- AP Dark Tone
- Vallejo wash and a dry brush of pale cream acrylic

Yes, I should have taken notes.
I think on the whole, the first test from yesterday is the winner. maybe with a much gentler dry brush of pale cream.

Saturday 20 April 2019

Beach boards 5 - rocks part 2 - OMG! WOW!

Holy freaking.....

Anne is wondering why I'm dancing around and cheering, having just got back from the parents at 10pm, popped in to the workshop to .... ok.

Ok.

Step back, Mike.  Upload the pictures and add captions:

Take some cheap white acrylic, semi-drybrush on the rocks (the Terrain Tutor calls this 'overbrushing') just to lighten up the base coat.
And this is still grey, which is not a good limestone colour. So.... Allow to dry while spending Easter Saturday with parents (mmm, fresh baked hot cross buns by my friend Piers in Doncaster - if you're anywhere near, just BUY the man's bread!)...
Next step. Take a big brush, and a pot of Vallejo's Game Colour Wash.... apply fairly liberally. 
Wow.


Friday 19 April 2019

Beach board 4 - experimenting with rocks

Only just got back from church band rehearsal after a busy day, so didn't really have time to edit the podcast as have to be off to parents early.

Did have time to do a little on the beach boards, specifically seeing if I can figure out a way to do the limestone rocks on a tester piece. This gallery is a combination of Mal the Terrain Tutor and Ballan Parkway's methods - follow the captions.

Here's a left over piece of pink foam from the
promontory/bay build the other day.  If I could have been bothered I'd
have roughly carved the surface with a craft knife to be less flat, but
for the purposes of this test piece it doesn't matter.

And this is just a piece of freshly screwed up baking foil.
All you do is roll it, pressing quite hard, on the surface of the foam... 
And presto! instant texture.
Same again, but this is the lid from a Gü cheesecake pot,
so it's noticeably stiffer foil. This I more pressed than rolled,
almost using it as a stamp.
...and even more texture. If you just wanted some random
rock, this would do fine. However, I want limestone...
Ideally what I wanted was the double-toothed saw blade off
my previous Swiss Army knife, but in the absence of that, this
old kid's safety knife from our kitchen drawer will do
(with Anne's blessing! 
(Slight focus issue, sorry)
Just use it to gouge horizontal strata in the rock face. The reason for the wider,
blunter blade is it leaves wide gouges and it also tends to rip bits from
the edges, which makes it look less even.
Final stage for tonight, paint with some neutral coloured emulsion and
leave to dry, With hindsight I might recoat with a paint/water/PVA
mix to seal it even better. Yes, I know rocks aren't grey.

Thursday 18 April 2019

Dux on a budget

Apropos of a question on the Facebook group, I've been doing the maths to see what the minimum investment is in figures to play Dux Britanniarum.

Obviously, your best bet at least for starters is going to be Gripping Beast plastics, namely one box of Late Romans, one box of Saxon Thegns, one box of Dark Ages Warriors. Lets have a look:

Dark Ages Warriors: 40 figures
  • 40 with spears (you end up using 18)
  • 16 with javelins 
  • 8 with swords
  • 32! with slings (you will use 8)
Saxon Thegns: 44 figures
  • 32 with spears (you end up using 30)
  • 36 with swords or axes (you end up using 2)
  • 2 officers, 2 standard bearers (you use the officers)
Late Romans: 44 figures
  • 16 with bow (find someone with a late Roman or Byzantine army to sell them to :D)
  • 24 with spear (you end up using 18)
  • 16 with sword - same body as spearmen (you end up using 2)
  • 2 officers, 2 musician/standard bearers (you use the officers)

Currently, GB will sell you this for £60 as a three box deal. You'll probably then need about 6 or 7 sheets of shield transfers if you don't want to hand paint them, at £3 a sheet.

For a starter Dux force, you will need

Saxons:
  • 12 elite
    • 12 from the Thegns box
  • 18 warriors
    • 18 from the Thegns box, or mix in some unarmored and/or bareheaded spearmen in each group from the Dark Age Warriors box so you can distinguish them from the elites
  • 4 slingers
    • from the Dark Age Warriors box
  • 3 Lords and a champion
    • two Lords, plus two figures with axe or sword from the Thegns box.

British:
  • 6 elite
    • 6 from the Late Romans box
  • 12 warriors
    • 12 from the Late Romans box (I'd distinguish these and the elites by using different shield designs - I have these on my elites, for example, and these on my warriors and levy, giving the levy the ones with white backgrounds)
  • 18 levy
    • 18 spearmen from the Dark Age Warriors box, but use heads and oval shields from the Late Romans box (or leave them bare-headed)
  • 4 slingers
    • from the Dark Age Warriors box
  • 3 Lords and a champion
    • use the two Lords, plus a couple with swords from the Late Roman box
This usefully leaves you enough figures to produce:
  • 2 Saxon warrior reinforcements (more if you used some of the Dark Ages Warriors)
  • 4 British warrior reinforcements 
  • 12 mercenary javelinmen
And yes, I know, the Thegns aren't perfect, being a bit late for the era, but it hasn't bothered me or my opponents (or apparently anyone reading this blog) in 5 years of playing Dux :D The other downside is that your missile troops are slingers, not archers (as the late Roman archers are armoured and thus not really right), but this isn't a huge problem IMO.

Wednesday 17 April 2019

Recording!

In fact, done recording the Miller's Tale episode 6 take... um... 3. Complete, and has had its first pass at editing and tidy up done. I am however, told by the Domestic Goddess that I am Done For The Evening, so the assemble edit and final tidy will have to wait till tomorrow. 

Posh Lard 2019

Yesterday's hobby activity was mostly planning Posh Lard 2019.

Provisionally, then (subject to enough interest) it'll be Sunday 2nd June at the club's premises in Peterborough. Entry £5 to cover the room rental. On site free parking, handy Wetherspoons/McD's/Subway/Waitrose for lunch. Handy very nice Thai restaiurant/real ale pub about 5 mins walk away for post-game meal, two hotels within walking distance for those who've come a long way, 3 mins walk from the station, 10 mins from the A1.

Assuming it goes ahead, there will be at least:
- Bloody Omaha - 15mm IABSM game run by the club: you can dip in for a morning or afternoon or both if you're mad enough
- 82nd @ St Mére Église - 28mm CoC courtesy of the Gravesend folks
- possibly a second IABSM game if there are enough folks and I can get one of the other club members to run Omaha. :D

I'd be ideally looking for another game or two - we *might* have Brecourt Manor as a CoC scenario if Gary from our club is free.

Rich has said he'll try and make it up for part of the day.

Need really a minimum of 10 folks to make this viable. If you could express an interest on here or anywhere else its mentioned before the end of April, then I can give it the nod or not.

Tuesday 16 April 2019

Sally 4th Terra-formers, hobby shopping..

One completed tile with one set of magnets glued in
the right way round!
 Yesterday was a bit fragmented, but I did manage a couple of useful things.

First off, being inspired by some thoughts about terrain (and watching some Mal the Terrain Tutor and Luke's APS videos while sneezing), I dug out the rather heavy box of MDF that's sitting on my bottom shelf that contains the result of a KS pledge for the Sally 4th Terra-formers terrain tiles. They've been on the 'been meaning to do something with this for a while' pile, and as I'm kind of on a terrain-building roll when not writing Dux stuff at present, I figured I should at least check out what I pledged :D

Answer: 33 assorted 1' square terrain frames (one 6'x4' board plus 9 extra). Essentially, for those who missed the KS, they're MDF modular frames into which you insert a 12' square of expanded or extruded polystyrene, and they're held together by magnets. Ash and Pippa down the club have some as well, so I assembled one enough to take it down the club and check we both had the magnets round the right way - now we do.

The annoying thing is they're not *quite* compatible with the Omaha Beach boards, which would be really cool as we have a lot of those boards which are essentially big flat 2' (ish) squares. The Omaha boards are blue craft foam, which ships in 600mm square sheets (hence the 'ish'!). Sally 4th chose to go imperial, and the outside dimensions of the tiles are 305mm (i.e. 1'), hence two Terra-former tiles are about 1cm longer than one of mine. They are the same height as near as makes no mind, though (as they're essentially 2"/50mm foam on 3mm board).

I had a cunning plan to rebate a strip of MDF into the sides of the Omaha tiles to fit Terra-former compatible magnets, but it seems to do this properly and make all the tiles accurate multiples of 1' square we'd need to box in the Omaha tiles in 5mm MDF and fill and flock the resulting edges. Since I have a plan afoot to do some more grass work the boards (yes, again: I'm not happy with the rather 'patchy' look), I may consider this - also, they currently have no edge protection and are getting a bit battered (and as a result you can see the board joins a lot more than I'd like).

Side note: There would be an alternative option to drop most of the Omaha tiles into Terra-formers' own 24" square frames, but they're 20 quid EACH (ouch) and I have 17 tiles (ok, 10 complete and 7 partial, not counting the actual beaches) that would need doing, and some would need cutting about to match our modular hill geometry! Getting a whole bunch (64) of 610mm x 50 mm strips of 5mm MDF cut off a sheet or two would be far cheaper, in the absence of a Sally 4th sponsorship deal, or a lottery win, or a bonus (fat chance of the latter with my employer) :D

And then I went shopping, for a bunch of hobby supplies. Some cheap acrylics for touching up terrain (AP Desert Yellow pots get awfully pricy for large scale terrain work), a fresh can of Rustoleum stone texture spray, a decent amount of my favourite PVA, some impact glue (B&Q own brand No More Nails) for sticking foam to boards...

...oh, and my WarWorld Scenics flock order arrives today.

Sunday 14 April 2019

More Compendium!

Can't tell you what yet, as I'm unsure if it'll make it into the final book or be held over for a downloadable 10 or so page PDF. Still, it needed to out of my head before I sneezed it out :D

Off to supper and a large Lemsip.

Saturday 13 April 2019

Starting on a watchtower

Been a bit of a busy day today, what with getting James down to London for a BMus degree audition. I also have the bunged-up and sneezing stage of something which may or may not be yet another bloody cold, so the plan to record the last 20 mins of the podcast has been shelved, hopefully only till tomorrow, as I'm trying to reduce my *atchoo* editing *sniff* work*snuffle*load. Besides, I soud bubged up. :D

I did though make a start on the Warbases watchtower: after all you have to have something to put on the promontory. It's one of their fairly early kits, IIRC, and they've got better at making things fit without needing multiple elastic bands and clamps now :D Still. Nice simple design, which I will tart up with filler, coffee stirrers and paint as part of the process.

Friday 12 April 2019

Another CoC QRS Update


Blame Allan Doran on Facebook for this update, as he pointed out a fix from the Errata, which led me to realise I hadn't actually scanned it for things to fix :D

Pages 2 and 6 will need reprinting for this change.

Thursday 11 April 2019

CoC QRS update

Rich, bless him, assures me there are no updates from the theatre handbook(s) that apply universally to the master rules, so I don't have to add stuff to the QRS. Note that I will not be creating theatre-specific QRS's. Buy the books :D
In fact, buy the books anyway: the QRS is only a play aid, and it is not a substitute for having the book handy. Besides, TFL deserve your money!

One change in this update, thanks to me actually using the QRS for the first time in a while at Crisis Point! Page 2 has a small clarification re defensive MGs in Close Combat, so if you're printing and laminating you'll only need to print the first two pages double-sided.

Wednesday 10 April 2019

Beach boards part 3

Andy (aka "the man who turns my crazy ideas into 3D reality") dropped round today for a while, and we set to on adding terrain to the new beach boards.

(The way Andy and I work is he's much better with large-scale tools than I am, and I have a better knack for visualising and describing what I want in 3D... it's a good team.)

Here's a gallery of what went on today - next up we start texturing the rock faces, a bit more work with the sander and maybe start painting.
A jigsaw to cut the basic outline of the promontory. 
Which sits like so on the board... 
Cutting the edges of the bay out of the excess. 
Annoyingly the sheet of foam we had isn't 600mm wide...
Last bit of spare on that sheet of foam makes the upper layer. 
Andy using the Japanese saw (no spine on the blade) to
do some broad shaping of the access paths to the
promontory.
...and after some finer work with a long-bladed
craft knife, here we are...
....and a path up the other side as well.
Some Loctite Power Grab to hold the two
halves together
And a little bit of work with the Japanese saw, craft
knife and electric sander to smooth the beach off.
Experimenting with one of the old beach
boards to see how I can do waves... any
guesses how this was done?

Related Posts Plugin for WordPress, Blogger...